
.svg)

.webp)
Mini-split systems have become a popular choice for homeowners seeking efficient, flexible heating and cooling solutions. At Supreme Heating and Cooling, we understand that a properly installed mini-split system is essential for achieving optimal comfort and energy savings. This guide walks you through the critical aspects of mini-split setup—from selecting the right type to placement, installation, refrigerant line routing, electrical requirements, and maintenance—empowering you with the knowledge to make informed decisions about your HVAC needs.
Understanding Mini-Split System Types
Mini-split systems, also known as ductless air conditioners or heat pumps, come in several configurations tailored to different home layouts and comfort needs. Knowing the types is the first step in mastering your mini-split setup.
- Single-Zone Systems: One outdoor compressor connected to one indoor air handler, ideal for heating or cooling a single room or area.
- Multi-Zone Systems: One outdoor unit supports multiple indoor air handlers across various rooms, providing individual room control.
- Ceiling Cassette Units: Mounted in the ceiling, these units distribute air evenly, excellent for rooms where wall space is limited.
- Floor-Mounted Units: Positioned near the floor, suitable for homes with specific architectural constraints.
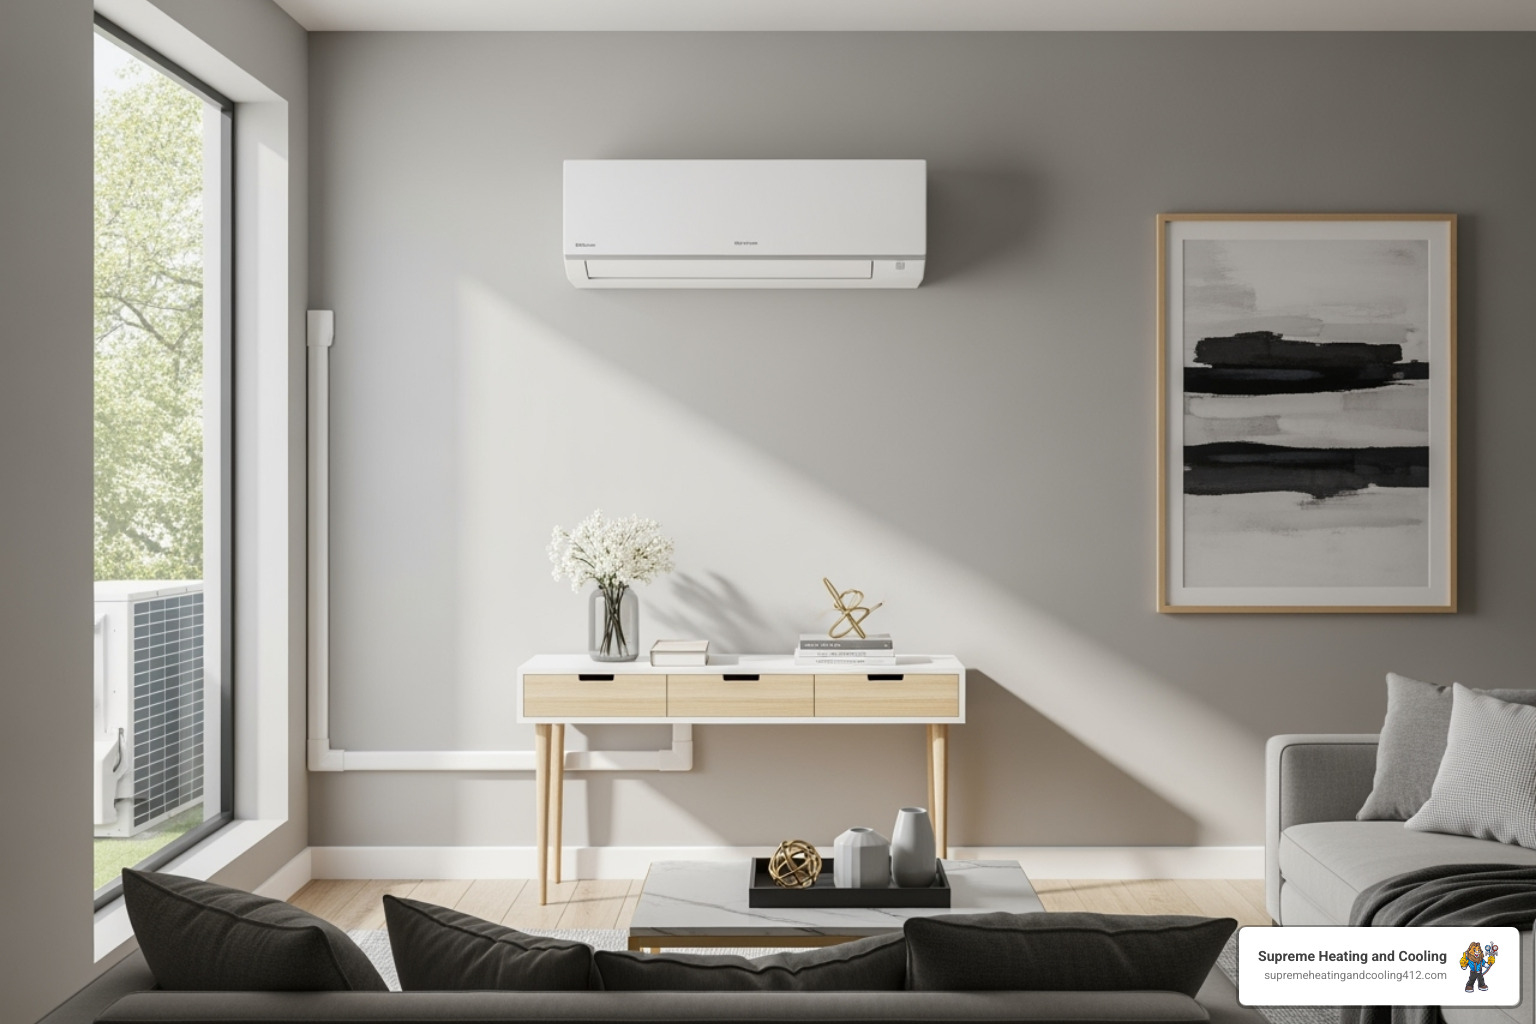
- Wall-Mounted Units: The most common type, typically installed high on a wall to maximize airflow efficiency.
Each type offers unique benefits depending on your home’s size, layout, and comfort requirements, crucial factors during the site assessment phase.
Site Assessment: The Foundation of a Successful Setup
A comprehensive site assessment cannot be overstated. This step evaluates your home’s structural and environmental conditions to determine the best mini-split type and installation locations.
Key considerations include:
- Room Size and Layout: Precise room measurements and layout analysis ensure the selected system can adequately heat or cool the space.
- Sunlight and Insulation: Rooms exposed to intense sunlight or with poor insulation may need higher capacity units or specialized placement.
- Outdoor Unit Location: Proximity to the indoor units, accessibility for maintenance, and weather protection influence outdoor unit placement.
- Indoor Airflow Patterns: Identifying natural airflow improves indoor unit positioning to avoid dead zones or drafts.
- Electrical Capacity: Assessing your home’s current electrical panel ensures it can handle the system’s demands safely.
In climates with temperature extremes, such as areas with harsh winters or hot summers, a thorough assessment is vital to balance energy efficiency with reliable performance.
Indoor and Outdoor Unit Placement: Maximizing Efficiency and Aesthetics
Proper placement of both indoor and outdoor units significantly impacts system effectiveness and longevity.
Indoor Unit Placement
- Install indoor units high on walls away from direct sunlight and heat sources to enhance cooling efficiency.
- Avoid locations near doors or windows where warm or cold drafts can interfere with consistent temperature control.
- Ensure sufficient clearance around the unit for air intake and maintenance access, typically at least 6 to 12 inches.
- For multi-zone systems, place units strategically to maintain balanced comfort across rooms.
Outdoor Unit Placement
- Select a shaded, well-ventilated spot sheltered from extreme weather to protect the compressor and prolong its lifespan.
- Ensure the outdoor unit is elevated on a stable platform to prevent water damage or debris accumulation.
- Maintain clearance of at least 24 inches around the unit for airflow and ease of servicing.
- Minimize the distance between indoor and outdoor units to reduce refrigerant line length, preserving system efficiency.
In regions prone to heavy snow or strong winds, additional protective measures like wind barriers or elevated mounts may be necessary to prevent operational issues.
Installation Steps: From Start to Finish
Mastering mini-split setup involves a clear, methodical installation process that adheres to manufacturer guidelines and local codes.
- Mount Indoor Units: Secure brackets level on the wall, install the indoor unit, and ensure it is firmly affixed.
- Position Outdoor Unit: Set the compressor on a solid base, connecting mounting brackets if required.
- Route Refrigerant Lines: Carefully run copper refrigerant lines, drain pipes, and electrical wiring between indoor and outdoor units through a small wall bore hole, insulated to prevent energy loss.
- Connect Electrical Components: Wire the system in accordance with safety standards, including a dedicated circuit breaker if necessary.
- Vacuum and Charge Refrigerant Lines: Remove air and moisture from refrigerant lines using a vacuum pump before opening valves to release refrigerant into the system.
- System Testing and Calibration: Power on the system, checking for leaks, proper temperature control, and quiet operation. Adjust settings as needed.
Professional installation ensures compliance with warranty requirements and maximizes the system’s reliability and efficiency.
Refrigerant Line Routing: Precision Matters
The refrigerant lines are the system’s arteries, transporting cooling and heating agents between units. Proper routing minimizes energy loss and prevents damage.
- Use insulated copper tubing designed for HVAC applications.
- Avoid sharp bends or kinks that can restrict refrigerant flow.
- Secure lines with clamps to reduce vibration and noise.
- Maintain slope in drain lines for efficient condensation removal.
- Protect lines from external elements using conduit or protective sleeves.
Skilled handling during installation preserves system functionality and reduces the chance of costly repairs caused by refrigerant leaks.
Electrical Needs: Safe and Efficient Power Supply
Mini-split systems typically require a dedicated electrical circuit for safe operation, often 20 amps or more depending on unit size.
- Confirm the home electrical panel can support the additional load.
- Use properly rated wiring and breakers to prevent overloads.
- Ground the system according to electrical codes to reduce risk of electrical faults.
- Employ licensed electricians for installation and inspections.
Electric supply stability directly correlates with system longevity and uninterrupted performance, especially in homes with variable power demands.
Maintenance Tips for Optimal Performance
Keeping your mini-split system in peak condition extends its lifespan and sustains energy efficiency.
Key maintenance practices include:
- Regular Filter Cleaning: Wash or replace indoor air filters monthly during heavy usage.
- Inspect Outdoor Unit: Clear leaves, debris, and snow to maintain airflow.
- Check Refrigerant Levels: Low refrigerant indicates leaks or maintenance needs.
- Schedule Professional Tune-ups: Annual inspections by HVAC experts can detect and resolve minor issues before they escalate.
- Monitor System Performance: Stay alert for unusual noises, reduced airflow, or temperature inconsistencies.
In regions with seasonal weather changes, adjusting system settings and upkeep frequency keeps the mini-split running optimally year-round.
Why Mastering Mini-Split Setup Matters in Your Home
Achieving mastery in mini-split setup translates into tangible benefits for homeowners seeking efficient, quiet, and flexible climate control solutions. Besides enhanced comfort, a correctly installed and maintained mini-split system offers:
- Reduced energy bills through zone-specific heating and cooling.
- Elimination of bulky ductwork, preserving home aesthetics.
- Quick response to temperature changes with quiet operation.
- Increased home value due to updated, modern HVAC technology.
With Supreme Heating and Cooling’s expertise guiding your mini-split journey, you position your home for comfort, efficiency, and reliability for years to come. Proper setup tailored to your unique home environment ensures that every degree of temperature precision counts, even against the challenges posed by seasonal extremes and varied local conditions.


.svg)
.webp)
.svg)
